|
The traditional way you bend plywood is to glue several layers of thin plywood together in a mould. Using steam to soften the wood fibres, the piece is set and dries over time to produce a piece of plywood that has a fixed bent shape. I want to talk about bending of plywood in a much simpler way which fits the central concept of many CNC-related designs: ease of manufacture/assembly. The purpose I want to focus on here is not necessarily for aesthetics (although it can be a nice by-product) but for strength. The first time I saw plywood being bent as part of a CNC-cut design was the bed frame by Spore. I was beautifully simple and elegant in the way it uses bending of plywood to create efficient strength. Using this design as inspiration, I created a single bed frame, followed eventually by a queen size bed frame. I drew the shapes from scratch in CAD using just their photos as reference material. It goes without saying that I don’t claim any design originality with these - all due credit goes to Spore. For me, creating these was a learning exercise in CAD, plywood bending and slot joints. 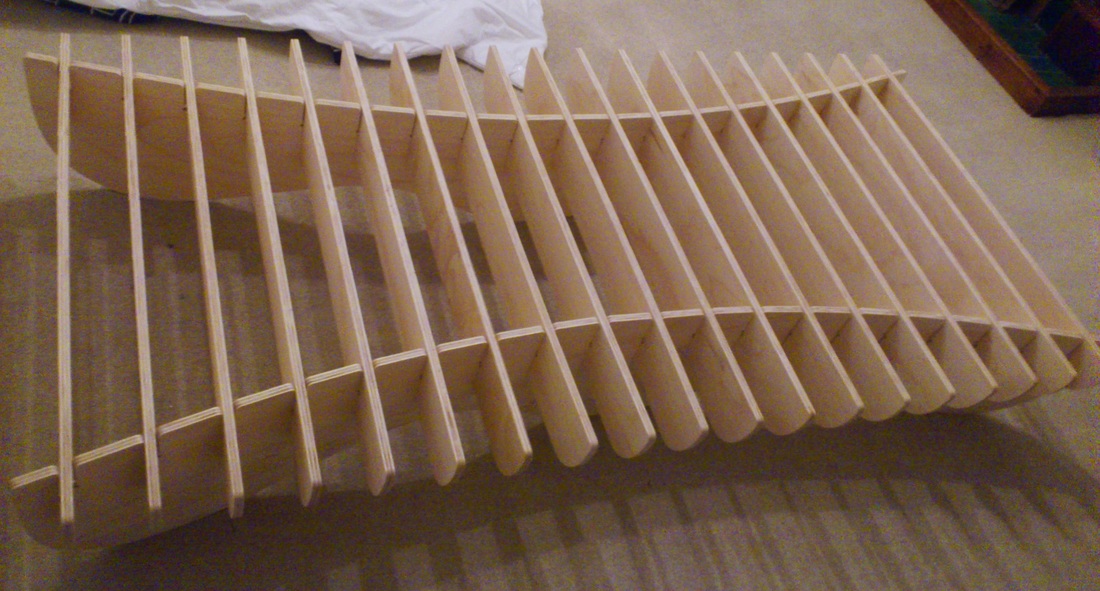 When you create 3D objects in CAD, you can intersect them and ask the CAD software to calculate where they intersect. Doing this with curved pieces needs a bit more work because you need to ensure that a piece cut on a flat CNC bed will, when bent, cause the slots to be in exactly the right position to allow the ribs to correctly be slotted in. I had to work out how I should model a bending piece of plywood in CAD. Should I just draw a thin curved face, then hope that the 12mm-thick cut piece in real life fits well enough with the ribs? How much does plywood stretch on the outside face compared to compression on the inside face? It turns out that it’s feasible to work on the assumption that plywood will compress as much as stretch, so my modelling was based on a thin face which sliced through the middle of the curved piece. I drew these curved thin pieces, then expanded in both directions - towards the outside and towards the inside, equally - to fill it out into a 3D. From there, I did intersections with the ribs. Here is a view of CAD showing both of those in progress: 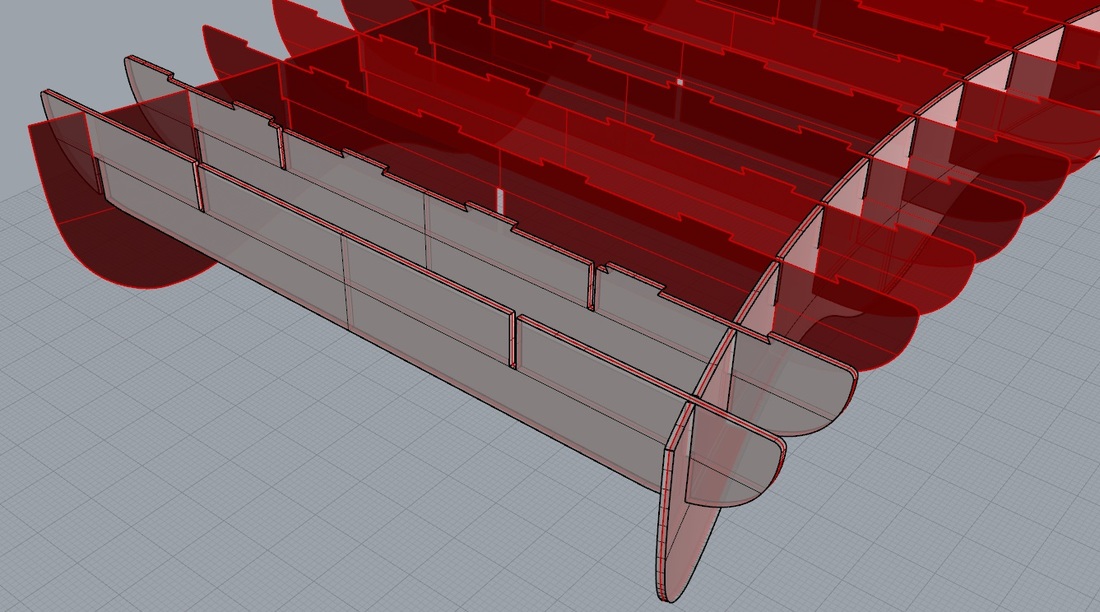 Each slot in the curved pieces needs to be based on the widest edge on both the inside and outside faces. After I draw this in the flat 2D view of the curved pieces I saw that the slots varied in width, which made sense because the ribs will intersect at different angles depending on their position relative to the curvature. 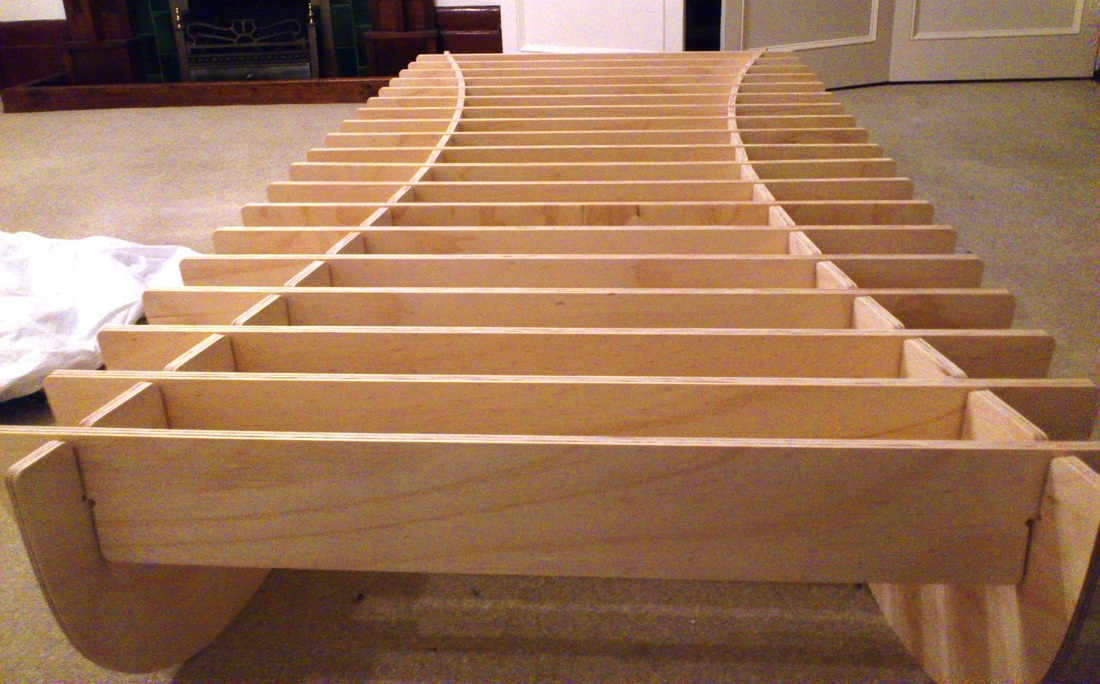 Assembling these took a little bit of effort as you have to push against the plywood resistance to being bent when slotting in the ribs, but once it is in place, it is incredibly strong. 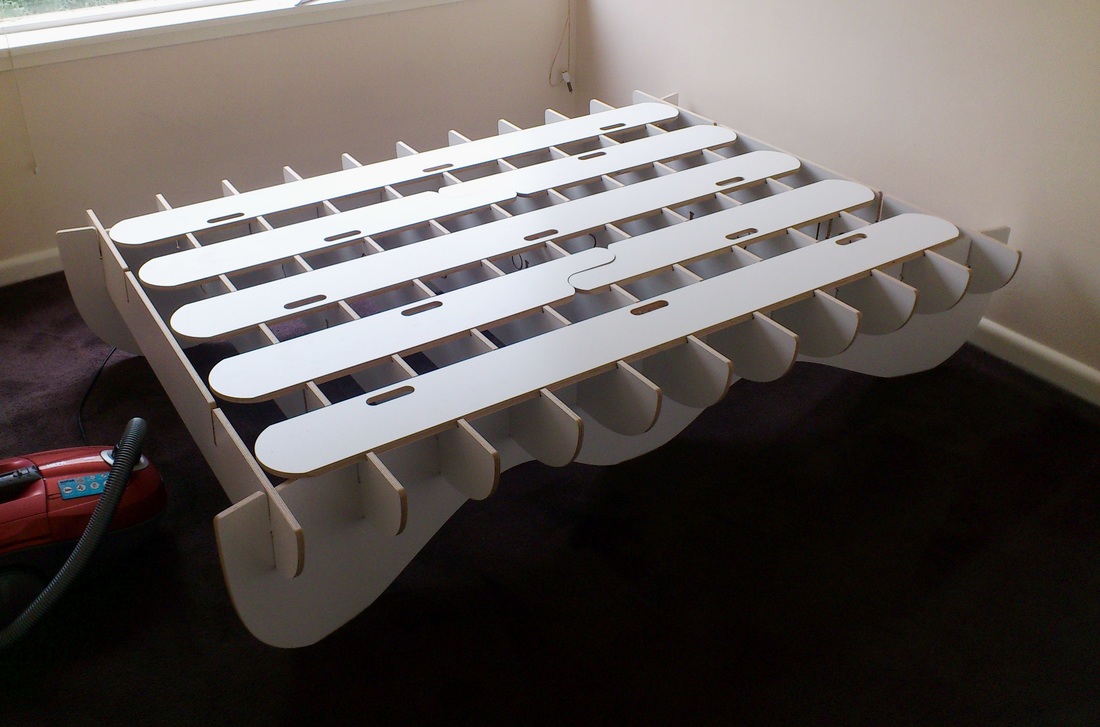 I now have a heavy queen-size mattress resting on the queen-size frame and people sleeping on top of that every night. Sometimes I think it’s crazy that all of that is being held up by just two pieces of 12mm plywood, but that is the strength you get from bending it. 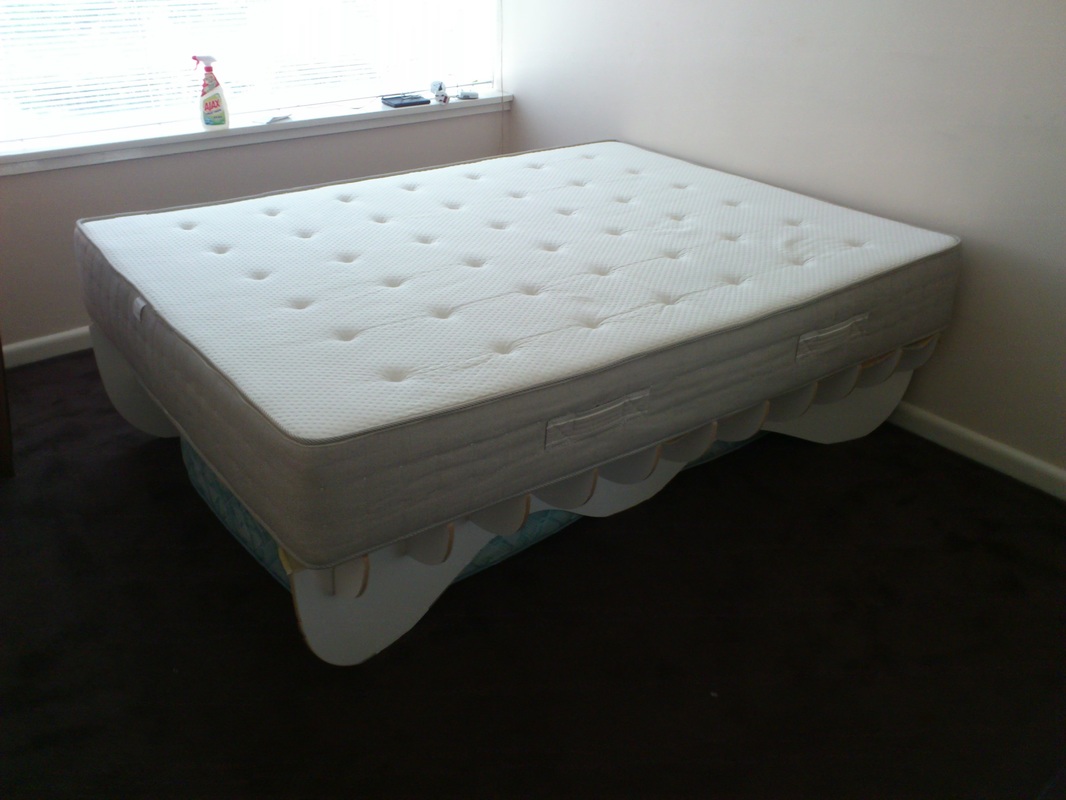
Comments
|
AuthorI'm Nicolaas, a software engineer with a creative streak. ArchivesCategories
All
|
 RSS Feed