|
While I was designing my pattern as described in my previous post, I was experimenting with some cheap fabric that I did actually buy from Spotlight as practice material. I wanted to iron out (mind the pun) any problems by sewing some cushion covers with this practice material first before getting the real fabric design custom printed. One task I found laborious was marking the shapes onto the fabric. Because they were so big (the rectangle for the seat was 930mm wide including seam allowance), I found it difficult as the material kept stretching and warping too much as I was marking it with a pen. Anyone who is an expert in sewing might chuckle at that and know a better way, but I came up with an idea that suited me: I wanted to have the lines printed onto the fabric itself. I figured that a machine printing onto fabric is bound to be fairly accurate; I could rely on that to ensure that, at the very least, the right angles I draw will come out as true right angles on the fabric. Through ringing around I learned that while this turned out to be correct, there could be shrinkage of the material either lengthways, sideways, or both, due to the printing process. There was a local digital fabric printing company who said their fabrics were treated beforehand to largely eliminate this shrinkage: Vapor Print. Just in case, I drew an extra line a couple of millimetres around each outline to enable me to use that line if the fabric had shrunk in that direction. To have fabric digitally printed, you need to send the printing company one large image to be printed. The width of this image needed to be the width of the fabric of course, but it could be any length. The length of the image for my couch’s cushion covers was around 10 metres:  I wanted to ensure the pattern would join and flow across seams. I also wanted to arrange them so that, when they were arranged together on the couch frame, the pattern from one cushion would line up with that of the neighbouring cushions: 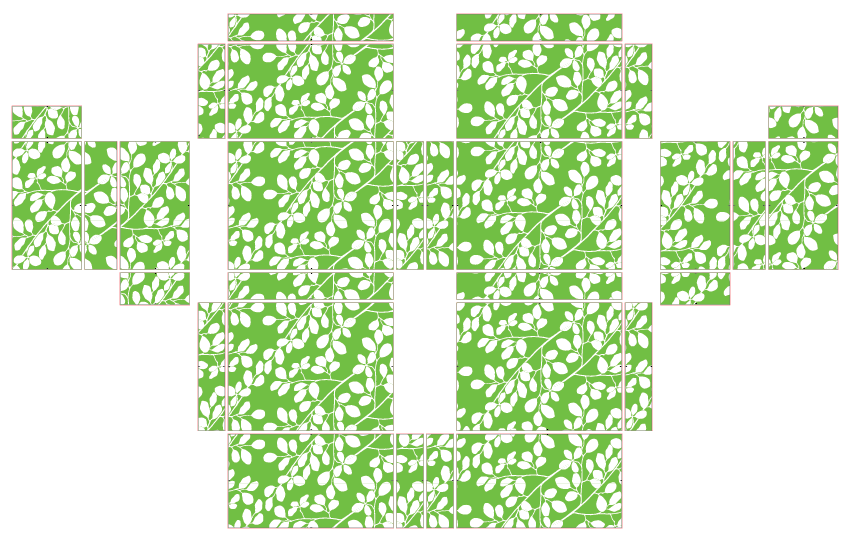 As it turns out, I achieved all of that except for the left seat cushion lining up with the right, and the left back cushion lining with the right. Oh well, I guess you’re bound to miss something sometimes. By the way, if you are wondering why the shade of green differs between the above two pictures, it's because I changed the shade after getting a trial print back from Vapor Print. When the printed fabric arrived I measured the distances and was pleased to find that the only shrinkage present was a couple of millimetres per metre in one direction only. This was very workable. 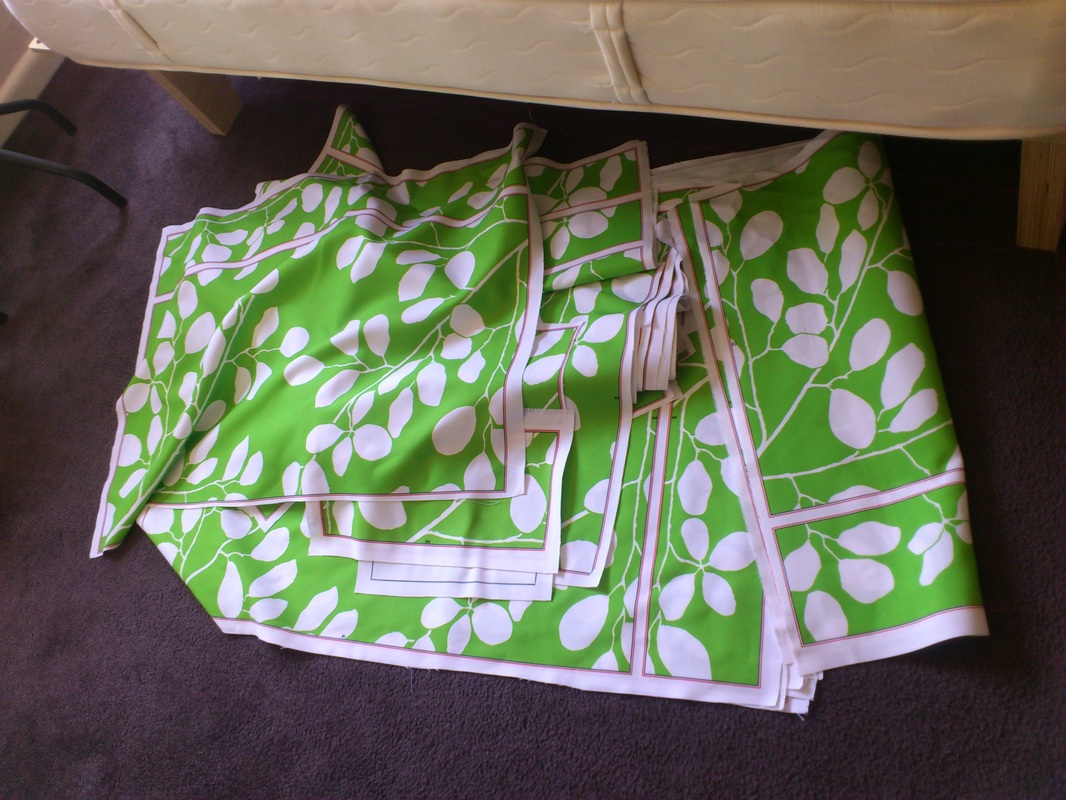 After I cut out all of the shapes by hand I thought about how I’d sew them together. From what I gathered (mind the pun), pins were the usual way you lined up two pieces to be sewn together and as you fed it through the machine, you removed the pins one by one. I had vague memories of fabric sliding despite the pins being there; I wanted to avoid the ends not lining up perfectly at the end of sewing 90 cm seams. My solution was to use tape to attach each piece together along each seam. I would then either remove the tape or leave it in there while I finished off the internal seam edges. This method worked out very well indeed - sewing seams which have already been taped up is a breeze. Having cut out the shapes using printed lines, the edges were quite accurately straight, so just maintaining the position of the edge of the fabric relative to the needle was all I needed (with my amateur skills) to ensure the sewing lines were straight. The only other skill I needed for this upholstery was the ability to sew zips. I found a great YouTube video that showed a good way to do it: Using this method, I was amazed at how well my own zips turned out. I don’t think I’d ever sewn a zip before but this technique worked a treat. 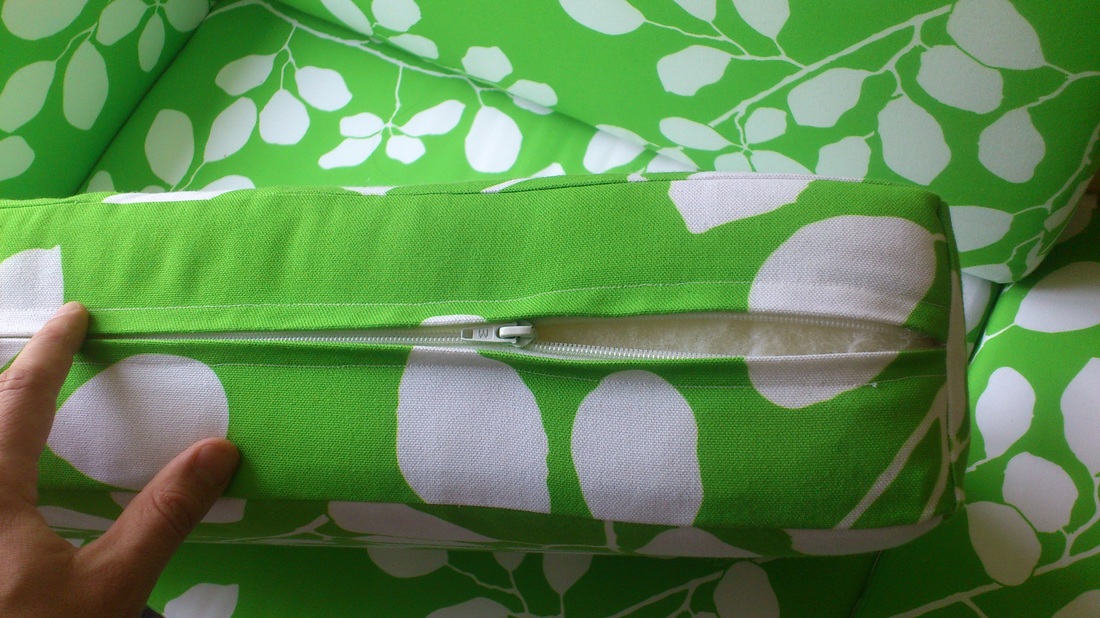 The foam, by the way, was sourced by R.B. Gray & Co.
Comments
|
AuthorI'm Nicolaas, a software engineer with a creative streak. ArchivesCategories
All
|
 RSS Feed